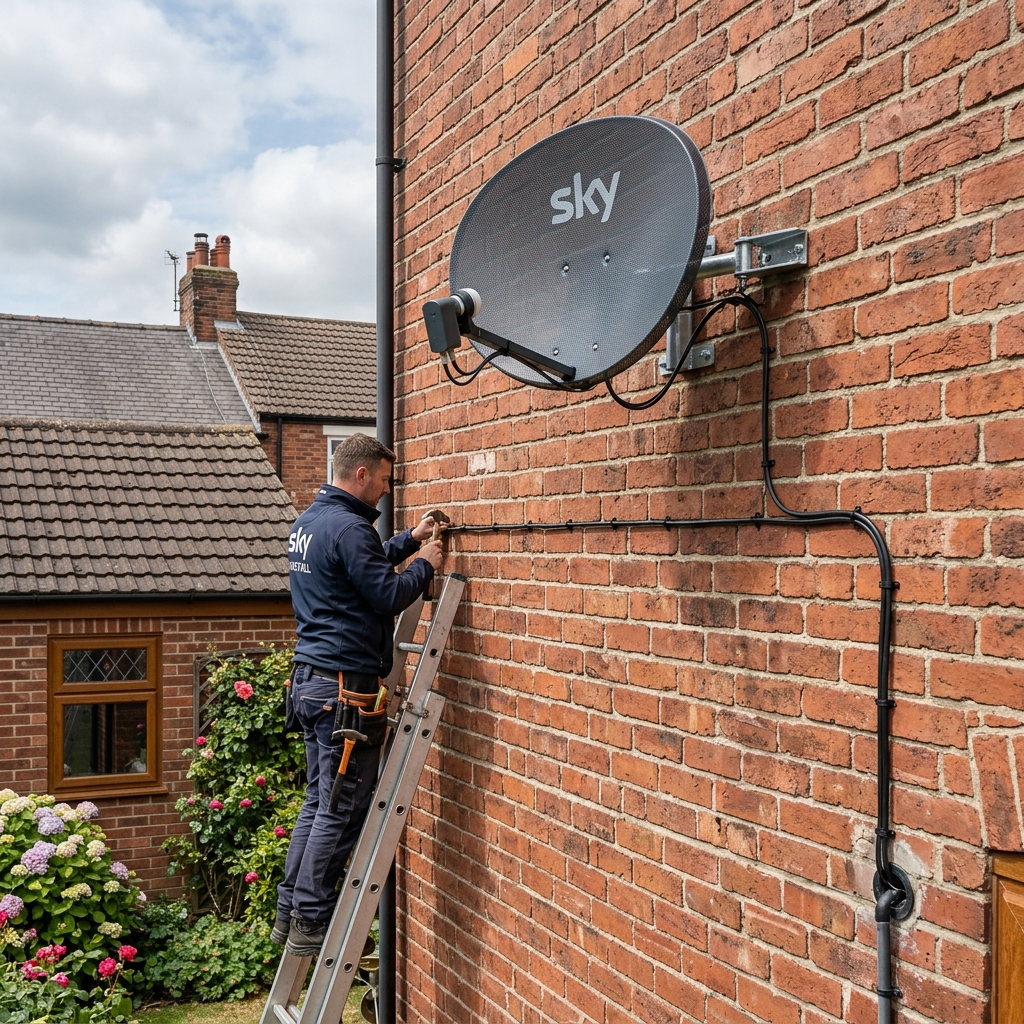
Satellite television remains one of the most reliable ways to stream ultra-high-definition content and access hundreds of local and international channels. Even with the rapid expansion of high-speed fibre broadband across the country, a physical satellite dish installation UK project ensures uninterrupted high-fidelity audio and video, completely independent of internet congestion. This comprehensive guide details the technical, regulatory, and practical steps needed to install and maintain your own satellite dish system in compliance with modern standards.
📺 UK Aerial & AV Installation Standards
Freesat vs Sky Q: The Hardware Differences
Freesat is subscription-free with 170+ channels, while Sky Q is a paid service with 300+ channels. The hardware differs at the LNB, with Sky Q requiring wideband LNBs. When executing a satellite dish installation UK layout, you must determine which service you want to receive, as this choice directly impacts the hardware you buy.
Understanding this hardware variation is absolutely critical. Both services run off the Astra 28.2°E satellite cluster, which means the structural physical dish itself is identical. However, standard or legacy Freesat boxes rely on a "Universal LNB". This older technology toggles between vertical and horizontal polarities using switching voltages (13V/18V) and uses a 22kHz pilot tone to flip between high and low frequency bands on a single run of cable.
Conversely, a modern Sky Q receiver operates with a "Wideband LNB". This device feeds two separate signals simultaneously (one vertical, one horizontal polarity) over two distinct cables across a wider intermediate frequency (IF) range of 290 MHz to 2340 MHz. This wideband structure is what allows you to record up to six channels simultaneously while watching a seventh. If you have a modern Freesat 4K Recordable box, it can also use a Wideband LNB to unlock multi-tuner capabilities. For complex properties where some residents use older legacy boxes while others use Sky Q, you will need to install a specialty "Hybrid LNB" or a "dSCR" (Digital Single Cable Router) LNB, which dynamically handles both signal protocols over the same coaxial distribution path.
Understanding UK Building Codes and Listed Building Consent for Satellite Dish Installation
Satellite dish installations in the UK fall under permitted development, but listed buildings or conservation areas require Listed Building Consent from local councils. A legal and safe satellite dish installation UK must adhere to the Town and Country Planning Order guidelines to avoid local enforcement actions.
For most residential houses, standard planning permission is not required because satellite dish installations are categorised under general Permitted Development rights. Under these conditions, the dish diameter cannot exceed 100 cm, and you are limited to a maximum of two satellite antennas mounted to the entire exterior of the building. Furthermore, the installation must be done in a way that minimises its impact on the external appearance of the property.
However, if your property is a listed building, situated in a conservation area, an Area of Outstanding Natural Beauty (AONB), or a national park, stricter regulations are enforced. Under local planning laws, installing an antenna on a chimney, wall, or roof slope visible from a highway in a conservation area is often prohibited without full planning permission. For listed properties, you must obtain Listed Building Consent prior to drilling any brackets into the masonry. Failure to obtain consent before beginning a satellite dish installation UK on a listed asset is a criminal offense and can lead to heavy prosecution, mandatory restorative repairs, and expensive court fees. Always verify with your local planning officer and use the official UK Government Planning Portal for real-time guidance.
Selecting the Correct Cable Grade for UK Climates
Always use double-shielded RG6 coaxial cable for UK outdoor satellite cable runs to resist water ingress and signal attenuation. A reliable, high-performing satellite dish installation UK depends on robust, weather-resistant cabling that complies with modern building and electrical guidelines.
According to BS 7671 electrical wiring standards and the Confederation of Aerial Industries (CAI) guidelines, outdoor signal cabling must be structured to withstand decades of cold, damp, and UV-heavy British weather. The gold standard for UK satellite installations is CAI-benchmarked copper-on-copper coaxial cable, specifically Webro WF100 or TX100. WF100 is engineered with a solid bare copper inner conductor, a physical foam polyethylene dielectric insulator, a copper foil shield tape, and a plain copper wire braid. This double-layer shielding blocks high-frequency RF interference from 4G/5G mobile masts and nearby Wi-Fi networks.
You should completely avoid cheap Copper Clad Steel (CCS) cables, which are often sold online as generic "RG6". CCS contains a steel core coated with a microscopically thin copper wash. When exposed to salt air and high moisture levels typical of the UK climate, the outer PVC sheath of CCS cable eventually develops hairline fractures. Water enters the core, rusting the steel interior and leading to a complete signal dropout. Furthermore, real copper cable offers much lower signal attenuation, ensuring that the high-frequency satellite signals make the long trip from the LNB to your receiver without losing valuable dB of signal power.
Essential Tools for Satellite Installation
Essential tools for satellite dish installation in the UK include a satellite signal meter, high-quality rotary cable strippers, compression F-connector tools, and masonry drill bits. Investing in professional-grade gear prevents damage to structural brickwork and ensures your satellite dish installation UK is aligned with millimeter precision.
Before attempting to mount and wire your satellite gear, make sure you have the following specialized equipment ready:
- Digital Satellite Signal Meter: Standard, cheap needle-based analog meters are not suitable for modern digital signals. You need a dedicated digital meter that can decode DVB-S2 signals, identify the specific Astra 28.2°E orbital position, and measure MER (Modulation Error Ratio) and Bit Error Rate (BER). This prevents you from accidentally locking onto adjacent satellites like Hotbird 13°E or Astra 19.2°E.
- Coaxial Cable Rotary Strippers: A standard utility knife can easily score or nick the internal copper conductor. A professional rotary stripper cuts the outer jacket and the dielectric insulator to the exact correct depths simultaneously, leaving the shielding braid intact.
- Compression F-Connector Tool: Traditional twist-on or hex-crimp F-connectors are highly susceptible to moisture ingress and pull-off failure. Heavy-duty waterproof compression connectors, when squeezed with a proper compression tool, form a permanent, gas-tight 360-degree seal around the cable's outer sheath.
- SDS Rotary Hammer Drill: Drilling through solid engineering brick or dense concrete cavity walls requires a powerful SDS drill. You will need a standard 10mm bit for drilling anchor shield holes and a long 10mm or 16mm masonry bit (minimum 450mm long) to pass the coaxial cables cleanly through the cavity wall.
- HSE-Compliant Safety Gear: When working at heights, your safety is paramount. Always use secure ladder clamps, a sturdy ladder stand-off (to prevent damage to your plastic gutters), and a safety harness anchored to a certified structural point if working above single-story limits.
Aligning Your Satellite Dish: A Step-by-Step Guide
UK satellite dish alignment targets Astra 28.2°E at specific regional angles: London (26° elevation / 145° azimuth) and Newcastle (22° elevation / 141° azimuth). Proper physical calibration is the most sensitive step of a satellite dish installation UK and determines whether your system will suffer from signal dropouts during heavy rain.
Follow this exact step-by-step procedure to get a professional, high-quality lock on the Astra satellites:
- Bracket and Mast Installation: Secure the steel bracket to the brick wall using heavy-duty anchor bolts or rawlbolts. It is absolutely vital that the vertical mounting mast is perfectly level and plumb in all directions. Use a high-quality torpedo spirit level. If the mast is off-axis by even half a degree, your azimuth and elevation calculations will interfere with each other, making successful alignment nearly impossible.
- Calculate Regional Target Angles: Because the Earth is curved, the satellite's position relative to your horizon shifts depending on your exact geographical location in the UK. Adjust the pitch and direction of the dish based on your local coordinates:
- London & South East: Set your vertical Elevation scale to roughly 26°, and point the dish to an Azimuth angle of 145° (using a magnetic compass corrected for declination).
- Newcastle & North East: Set the Elevation scale to roughly 22°, and point the dish to an Azimuth of 141°.
- Edinburgh & Central Scotland: Set your Elevation scale to roughly 20°, and point the Azimuth to 140°.
- LNB Skew Calibration: The signals broadcast from the Astra 28.2°E group are aligned on a specific geometric grid. Because of the Earth’s curve, the LNB must be rotated in its holder to align its internal copper probes with these incoming signals. Looking from the front of the dish (facing the reflective dish surface), slowly rotate the LNB clockwise. The correct skew angle ranges from approximately -10° in London to -15° in Northern Scotland. Once set, tighten the LNB collar screws securely.
- Signal Optimization: Connect your digital meter to the LNB output. Sweep the dish slowly from East to West around the target bearing. When you hear the lock tone, pause. Gradually adjust the elevation bolt up and down, then tighten the azimuth bolts in small increments. Your target metric is MER (Modulation Error Ratio); aim for a reading above 12 to 14 dB for a reliable, weatherproof connection.
Advanced Cable Routing & Water Ingress Prevention
Advanced cable routing prevents water damage by employing downward-drilled entry holes, drip loops, and waterproof self-amalgamating tape termination. Protecting your property from moisture damage is a key indicator of a professional-grade satellite dish installation UK.
When running coaxial cables from the roofline or wall down to the point of entry, always keep the cable as straight and neat as possible, following the mortar lines of the brickwork to preserve the look of the home. Never bend the cable tightly around sharp corners; coaxial cable has a minimum bend radius of roughly five times its diameter (about 35mm for WF100). Bending it too sharply will crush the foam dielectric, which alters the cable's impedance and degrades high-frequency signal transmission.
When drilling the cable entry hole through the external wall, always drill from the inside of the house pointing downwards toward the outside. This downward slope prevents gravity from pulling rainwater through the wall cavity. Before the cable enters the brickwork, form a physical "drip loop"—a small, U-shaped drop in the cable that sits below the level of the entry hole. This forces rainwater to collect and drop off the bottom of the curve rather than tracking along the cable and into the brickwork. Seal the exterior entry point with a plastic "brick-buster" plate to prevent the face of the brick from cracking, fill the hole completely with weather-resistant silicone mastic, and wrap all exterior F-connectors in self-amalgamating tape to shield the copper interfaces from oxidation.
Video Walkthrough
Satellite Services Comparison
| Service | Monthly Cost | Channels | Equipment Required |
|---|---|---|---|
| Freesat | £0 (Free) | 170+ Channels | Freesat Box or Smart TV + Dish |
| Sky Q | Subscription (£26+) | 300+ Channels | Sky Q Box + Dish + Contract |
| Sky Glass / Stream | Subscription (£26+) | Over Broadband | No dish required |
Frequently Asked Questions
Need a Professional Quote?
Our certified UK engineers are ready to help. Get a free, no-obligation quote for professional installation tailored to your property.